
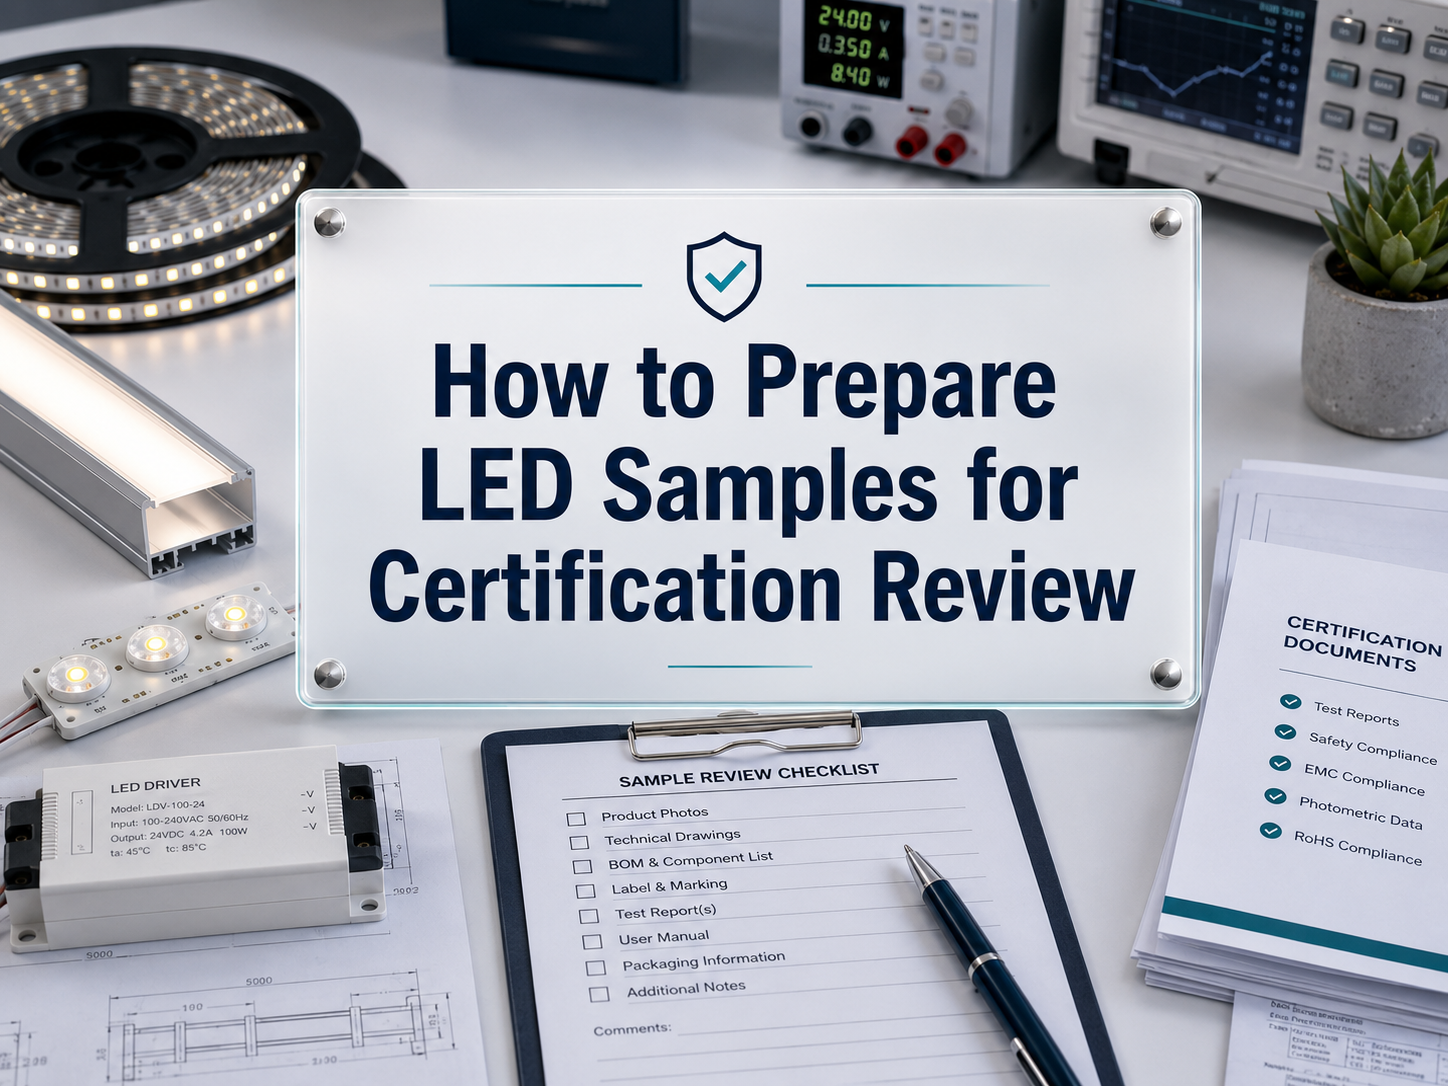
To prepare LED samples for certification review, you need to submit production-representative units, verified electrical and photometric data, correct markings, complete technical documents, and any required accessories for safe installation and testing. The lab should be able to inspect, power, mount, measure, and identify the sample without guessing how the final product will be built.
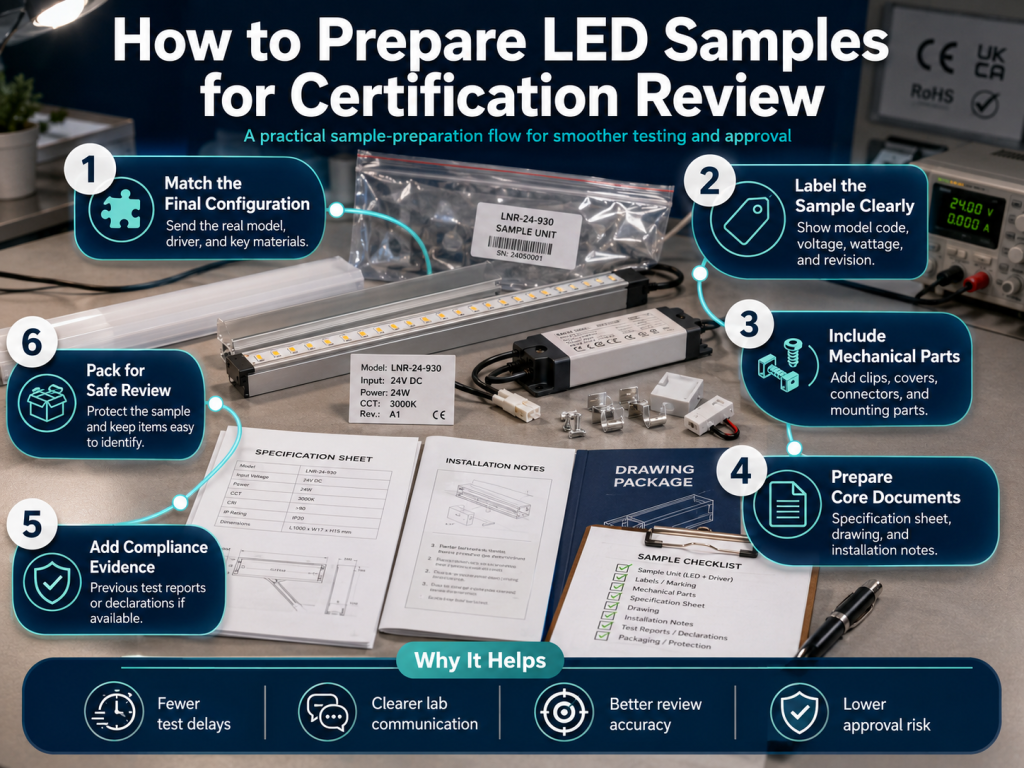
What Certification Sample Preparation Means
Certification sample preparation is the controlled process of selecting, checking, labeling, packing, and documenting LED lighting products before they are sent to a testing body or certification agency. It applies to luminaires, LED strips, LED modules, drivers, cabinet lights, linear lights, outdoor fixtures, industrial fixtures, and integrated lighting assemblies.
The goal is not only to “send a working sample.” The goal is to provide a sample that represents the final product construction. Specifically, the certification body will compare electrical safety, mechanical structure, thermal behavior, material selection, marking, installation method, and sometimes photometric performance against the documents you submit.
That matters because certification is usually tied to a defined product design. If mass production later uses a different driver, thinner wire, alternate LED board, changed housing material, or modified lens, the certified construction may no longer match the actual product. Consequently, the project may face retesting, shipment delays, customs issues, or field compliance concerns.
This guide applies when you are preparing samples for safety certification, EMC review, RoHS documentation, CE technical file support, UL or ETL evaluation, IP rating test, IK impact test, LM-79 photometric testing, DLC listing preparation, or an internal pre-compliance review before formal submission.
Key Terms and Documents You Should Understand
Before sending samples, align the language used by engineering, production, purchasing, and the lab. Different teams may use the same model name but refer to different versions. A controlled definition reduces avoidable lab questions.
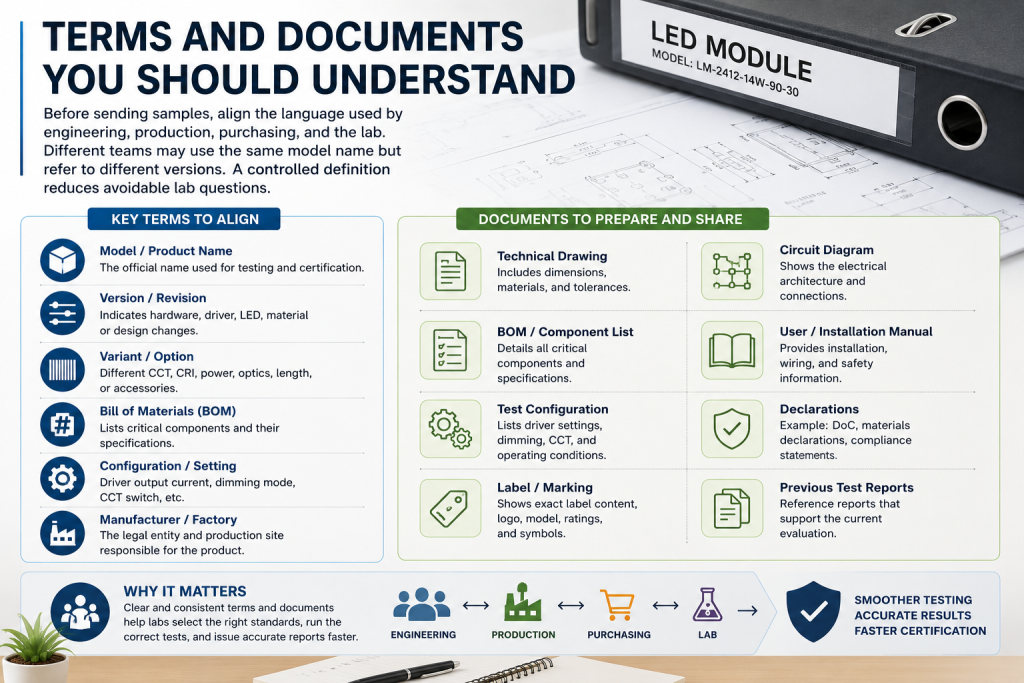
| Term or Document | What It Means | Why It Matters for Review |
|---|---|---|
| Production-representative sample | A sample built with the same critical components, materials, wiring, enclosure, and assembly method intended for mass production. | The certification result normally applies to the reviewed construction, not to an earlier prototype or modified later version. |
| BOM | Bill of materials listing critical parts such as LED PCB, driver, fuse, terminal block, cable, lens, gasket, housing, adhesive, and screws. | The lab uses it to identify safety-critical components and check whether certificates or material ratings are needed. |
| Rated input | The official voltage, frequency, wattage, and current declared on the label and datasheet. | Incorrect ratings can cause test mismatch, wrong test conditions, or label rejection. |
| Critical component | A part that affects safety, fire risk, electrical insulation, temperature, EMC, or installation reliability. | Substituting critical components often requires engineering review or additional testing. |
| Installation instruction | The document explaining mounting position, wiring method, driver location, spacing, ambient temperature, and restrictions. | Labs use it to judge intended use and to test the product under realistic worst-case conditions. |
| Photometric report | A test report covering lumen output, luminous efficacy, CCT, CRI, beam angle, and intensity distribution. | It supports lighting performance claims, specification accuracy, and energy program submissions. |
| Technical file | A document set that may include risk assessment, test reports, drawings, declarations, labels, and conformity evidence. | It supports regulatory review and future audits, especially for CE-related compliance routes. |
In practice, document control is as important as sample build quality. A good sample with unclear documents can still fail the review process because the lab cannot confirm ratings, component identity, or intended installation conditions.
Core Technical Principles Behind Certification Review
Certification review is based on defined use conditions. The lab needs to know how the LED product is powered, mounted, cooled, wired, dimmed, protected, and maintained. If those conditions are unclear, the review may become conservative, delayed, or incomplete.
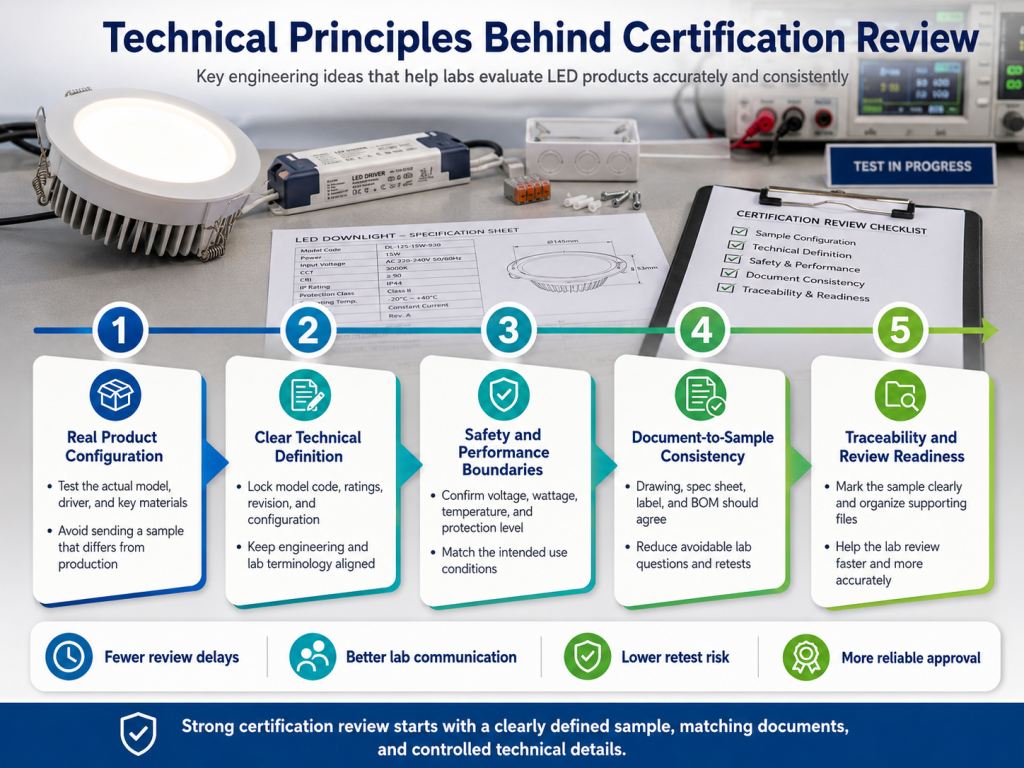
Electrical ratings must be verified before submission
Do not rely only on theoretical wattage from LED quantity or driver label data. Measure the complete product under rated input voltage and full load. For constant voltage systems, check input voltage at the LED module or strip under operating load because cable length can cause voltage drop. For constant current systems, confirm the LED module current matches the driver output and does not exceed the LED board design limit.
Important electrical checks include input voltage range, frequency, rated wattage, operating current, standby power if relevant, power factor, total harmonic distortion where required, leakage current, dielectric withstand, grounding continuity, inrush current, and dimming compatibility.
Thermal behavior affects safety and lifetime
LED performance depends strongly on heat dissipation. Certification review may include temperature rise testing on the LED board, driver case, enclosure surface, wiring insulation, connector, gasket, and mounting surface. A sample that performs well on an open bench may overheat when tested inside a cabinet, recessed channel, sealed enclosure, or high ambient environment.
Consequently, the sample should include the actual heat sink, diffuser, mounting clips, adhesive tape, brackets, and driver placement method. If the final product requires an aluminum profile, ventilation gap, or remote driver location, the instruction sheet must state it clearly.
Mechanical construction must match installation reality
Certification review often checks strain relief, sharp edges, screw engagement, connector security, ingress protection, impact resistance, and mounting stability. This is especially important for outdoor lighting, industrial lighting, under-cabinet products, and equipment-integrated LED modules.
If the product is rated IP65, IP67, or IP68, seals, cable glands, potting, end caps, and enclosure joints must be production quality. A hand-built sample with uneven silicone or loose end caps may not reflect final manufacturing quality and can create unnecessary test failure.
Technical Factors to Check Before Sending Samples
The following factors help you decide whether the sample is ready for formal review or still needs internal correction. Use them as a pre-submission engineering checklist.
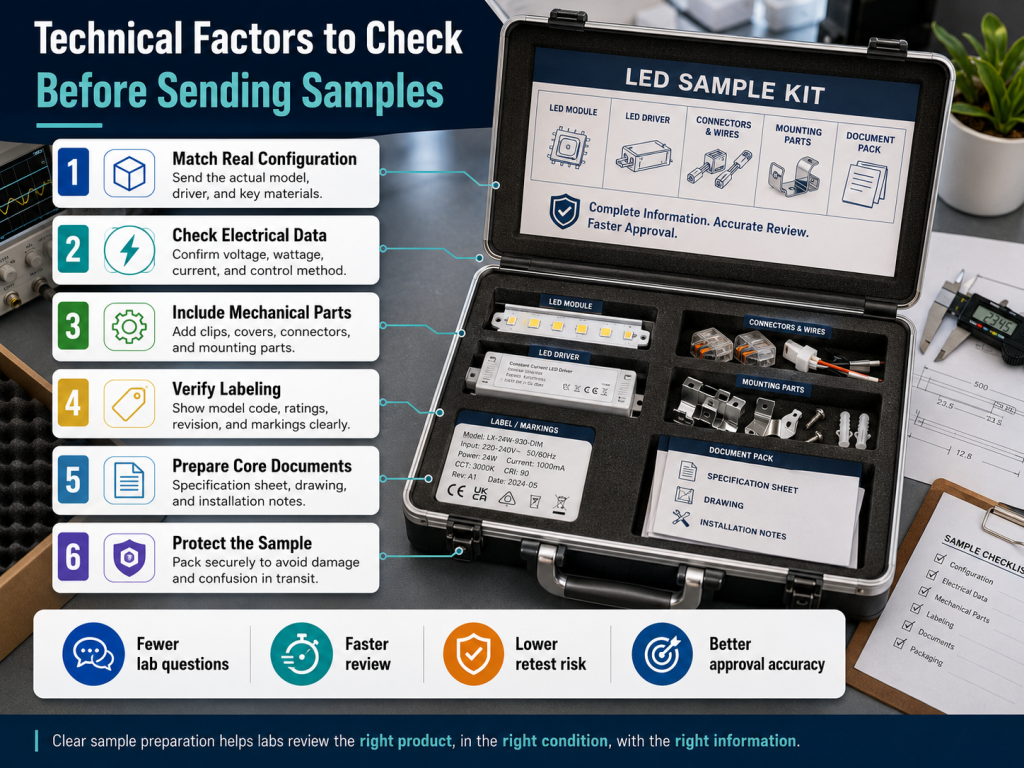
| Factor | What to Check | Typical Risk if Missed |
|---|---|---|
| Model identification | Model number, variant code, wattage version, CCT, beam angle, driver option, and revision level. | The lab may test the wrong version or issue reports that do not match production. |
| Input rating | Voltage range, AC or DC input, frequency, wattage, current, and driver output mode. | Wrong test setup, incorrect label, or failed electrical safety review. |
| LED performance | Luminous flux, luminous efficacy, CCT, CRI, SDCM, beam angle, and lumen maintenance basis if available. | Specification mismatch or difficulty supporting energy performance claims. |
| Driver compatibility | Constant voltage or constant current type, dimming method, load range, isolation, output class, and protections. | Flicker, overload, overheating, dimming failure, or unsafe wiring configuration. |
| Thermal path | LED PCB contact, heat sink material, enclosure design, driver location, ventilation, and ambient temperature limit. | Temperature rise failure, shortened lifetime, or maintenance complaints. |
| Ingress and impact protection | IP rating target, gasket design, cable gland, potting, drain path, IK rating, and enclosure strength. | Water ingress, corrosion, lens cracking, or field failure in harsh environments. |
| Marking and label | Product label, input rating, warning text, certification mark space, traceability code, and installation restrictions. | Label rejection, relabeling cost, or delayed approval. |
| Packaging for lab shipment | Shock protection, sample list, accessory kit, wiring diagram, and handling notes. | Damaged samples, missing parts, or repeated communication with the lab. |
However, not every certification project needs the same test scope. A low-voltage LED module for equipment integration may require a different document set than a complete mains-powered outdoor luminaire. Confirm the certification target first, then build the sample package around that scope.
Step-by-Step Guide to Preparing LED Samples
A controlled workflow helps engineering and production teams avoid last-minute changes. The following process works well for new product certification, model family expansion, and compliance review before project quotation.
| Step | Action | Output to Prepare |
|---|---|---|
| 1 | Define the certification scope and market. | Target standard, region, product type, installation environment, and review purpose. |
| 2 | Freeze the product version for testing. | Confirmed model code, drawing revision, BOM version, driver option, and LED board version. |
| 3 | Build production-representative samples. | Samples using final materials, final assembly method, final wiring, and intended accessories. |
| 4 | Perform internal electrical checks. | Measured voltage, wattage, current, power factor, dimming function, and abnormal behavior notes. |
| 5 | Perform internal mechanical and thermal checks. | Mounting verification, strain relief check, surface temperature data, and enclosure inspection. |
| 6 | Prepare technical documents. | Datasheet, BOM, drawings, wiring diagram, label artwork, installation instruction, and component certificates. |
| 7 | Mark and pack the samples. | Sample identification labels, accessory list, test purpose notes, and secure packaging. |
| 8 | Submit with a communication sheet. | Contact person, requested tests, model list, rated conditions, special setup notes, and declared limitations. |
Step 1: Define certification scope and market
Start by confirming where the product will be used and sold. A fixture intended for North America may need UL or ETL evaluation, while a European project may require CE-related documentation, EMC review, RoHS declaration, and applicable IEC standard alignment. Energy programs such as DLC may require photometric and performance data in addition to safety evidence.
Specifically, state whether the product is for dry, damp, wet, indoor, outdoor, recessed, surface-mounted, portable, fixed, furniture-integrated, or equipment-integrated use. These use conditions affect test setup and safety interpretation.
Step 2: Freeze the sample construction
Do not send a sample while the driver, LED PCB, diffuser, cable, connector, or housing is still under open evaluation. If changes are likely, the certification review may not represent the final product. Freeze the construction long enough to complete testing and create a clean technical file.
For model families, define which variants are included. For example, a linear light family may include 300 mm, 600 mm, 900 mm, and 1200 mm lengths, several CCT options, and multiple wattages. The lab may choose representative worst-case samples based on power density, thermal load, construction, and electrical configuration.
Step 3: Build samples using final materials
Use the same PCB thickness, copper weight, LED package, adhesive, diffuser material, gasket, cable, terminal, screws, potting compound, and housing finish intended for production. If a material is flame-rated or UV-resistant, keep supporting documents ready. For plastic enclosures or lenses, material grade can be critical.
In contrast, a prototype with substitute parts may be useful for engineering review but not ideal for formal certification. The lab may request additional evidence or reject the construction basis if critical components are not clearly identified.
Step 4: Run internal pre-checks
Before shipment, power each sample under rated conditions. Record input voltage, wattage, input current, driver output, operating temperature, dimming behavior, flicker observation if relevant, and any audible noise. Check all labels and compare them against the datasheet and wiring diagram.
If the product uses 0-10 V, DALI, Triac, PWM, DMX, or Bluetooth control, test the declared dimming method with a compatible control device. Dimming failures often create delays because the lab may not know whether the problem comes from the driver, control signal, load range, or wiring method.
Step 5: Pack documents and accessories with the samples
Include mounting brackets, screws, clips, suspension kits, connectors, end caps, power feed cables, remote drivers, and required installation tools if they are part of the certified construction. If the product requires a specific driver, do not expect the lab to select one independently.
Attach a sample submission sheet that explains each sample’s purpose. For example, mark one unit for temperature test, one for dielectric test, one for construction inspection, and one for photometric measurement if the lab requests separate units.
How Sample Preparation Affects Specification and Product Selection
Certification preparation often reveals specification gaps before they become project problems. If the datasheet says 24 VDC and 10 W/m, but the tested strip consumes 12 W/m at nominal voltage, the driver size, thermal design, energy calculation, and label all need review.
Similarly, if the product is specified as CRI 90 and 3000 K, the sample must use LED bins that support the claimed CRI, CCT, and SDCM tolerance. For retail lighting, hospitality lighting, and architectural linear lighting, color consistency can affect both approval and visual acceptance. If multiple CCT options are included in one model family, document how LED bins are controlled in production.
Driver selection also affects certification strategy. A built-in driver becomes part of the luminaire construction. A remote driver may need clear compatibility limits, output class, maximum cable length, installation instructions, and protection requirements. If buyers can select third-party drivers, the product documentation should define acceptable input and output conditions carefully.
What this means in practice is straightforward. Certification sample review is not only a lab event. It is a product definition checkpoint. When sample data, drawings, labels, and installation instructions are aligned, quotation becomes more accurate, installation planning becomes easier, and future production changes become easier to control.
Impact on Installation, Cost, Reliability, and Compliance
Poor sample preparation can increase cost in several ways. Retesting fees, express sample rebuilding, repeated courier shipments, document revision, delayed project approval, and production hold time can all exceed the cost of careful pre-submission checking.
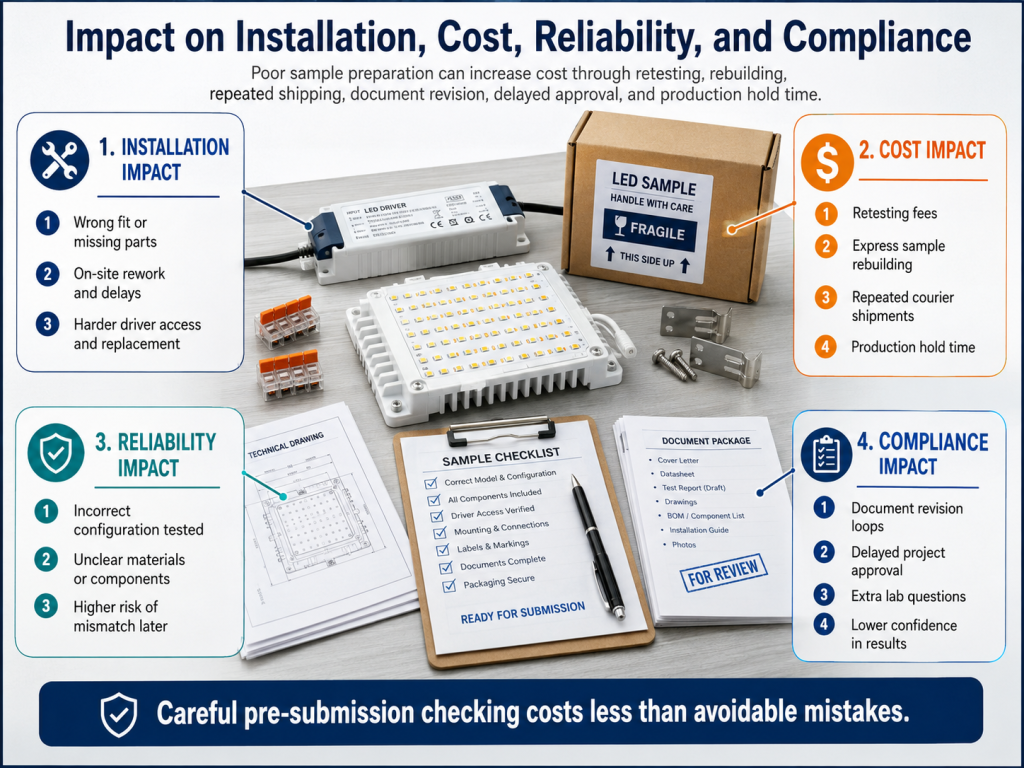
Installation efficiency is also affected. If the certified installation method is unclear, contractors may mount the product in a way that restricts heat dissipation, bends cables beyond safe limits, exposes connectors to water, or uses an incompatible dimmer. Therefore, the instruction sheet should state mounting orientation, spacing, driver access, cable routing, ambient temperature limit, and maintenance access.
Reliability depends on the same details. A correct IP rating requires more than a sealed appearance. Cable entry, gasket compression, potting quality, enclosure pressure balance, and condensation path all affect real outdoor performance. For industrial locations, vibration, impact, dust, chemical exposure, and cleaning method can become more important than nominal lumen output.
Compliance risk increases when sample and production versions drift apart. For example, changing to a lower-cost driver after certification may affect EMC, thermal rise, leakage current, dimming performance, and safety isolation. Changing the housing material may affect flame rating, UV resistance, or impact strength. These changes should go through engineering review before purchasing approval.
8. Common Myth vs Reality
| Myth | Reality | Practical Response |
|---|---|---|
| A working LED sample is enough for certification review. | The lab also needs documents, markings, ratings, installation details, and component evidence. | Prepare a full sample package, not only a powered product. |
| Any approved LED driver can be used after certification. | Driver substitution may affect safety, EMC, thermal behavior, dimming, and report coverage. | Define approved driver models or clear compatibility rules. |
| Photometric testing can use a different sample than safety testing without control. | Performance data should represent the same product configuration being specified or listed. | Track sample version, LED bin, lens, driver, and operating mode for each report. |
| Labels can be finalized after testing. | Marking content is often part of the review and may require approval before production. | Submit draft labels early and align them with rated electrical data. |
| IP rating only depends on the enclosure design. | Assembly quality, cable gland torque, gasket material, potting, and mounting position also matter. | Build IP test samples using controlled production methods. |
These misunderstandings usually come from treating certification as a paperwork step after product design. In reality, certification review checks whether product design, production process, and declared use conditions are consistent.
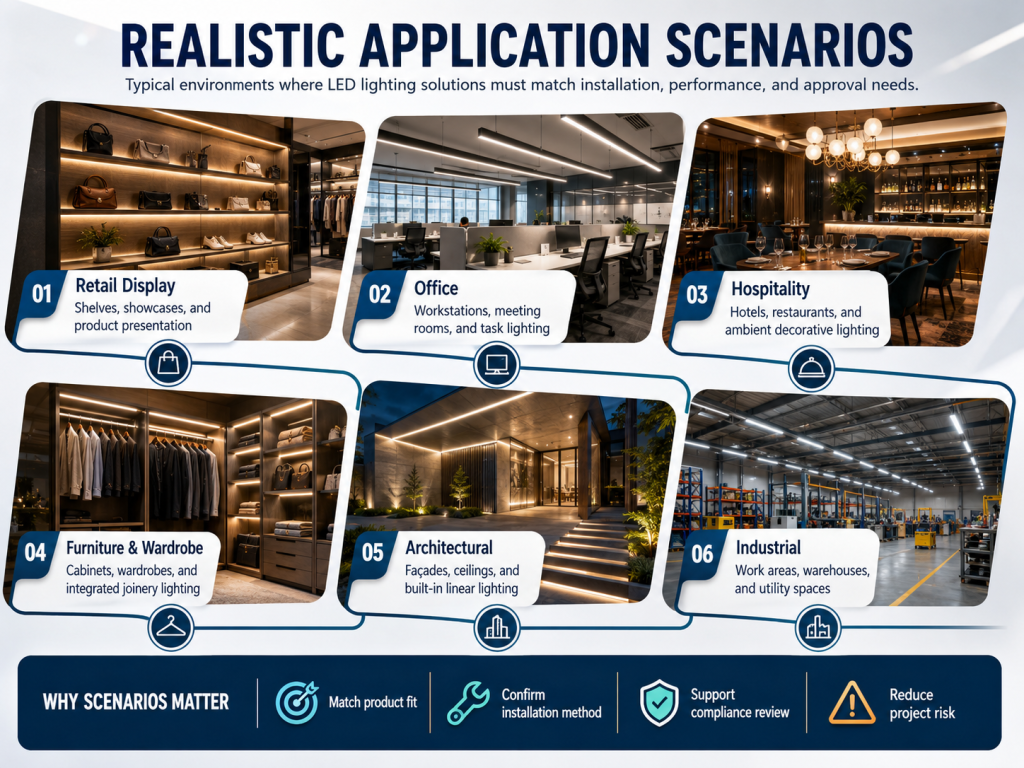
Realistic Application Scenarios
Commercial linear lighting project
A commercial linear light is prepared for safety and photometric review. The team submits 1200 mm and 600 mm versions, several CCT options, a dimmable driver, mounting clips, suspension hardware, wiring diagram, label draft, and LM-79 test request. The key risk is thermal rise in the longest, highest-wattage version because it usually creates the worst-case condition.
Outdoor LED fixture with IP rating target
An outdoor fixture is submitted with IP65 or IP66 target. The sample package includes gaskets, cable glands, installation orientation, drain design notes, enclosure material data, and screw torque requirements. The key risk is water ingress caused by inconsistent assembly, not only design weakness.
Low-voltage LED strip for cabinet integration
A 24 VDC LED strip is reviewed for use in cabinet lighting. The submission includes strip samples, aluminum channel, diffuser, feed cable, connector, compatible driver, maximum run length, wattage per meter, and installation temperature limit. The key risk is voltage drop and heat buildup when the strip is installed in a narrow enclosed space.
Equipment-integrated LED module
An LED module used inside a machine or display system may not be a complete standalone luminaire. The review depends on input voltage, insulation, wiring, connector type, mounting surface, surrounding temperature, and the host equipment conditions. The key risk is unclear responsibility between module certification and final equipment compliance.
Pro Tip / Field Experience
Pro Tip: Always keep one identical “golden sample” in your factory after sending samples to the lab. Mark its BOM version, LED bin, driver batch, wiring route, and label revision. When the lab asks a technical question three weeks later, your team can inspect the matching unit immediately instead of relying on memory, photos, or outdated drawings.
Final Pre-Submission Review Checklist
Before booking formal tests, run one final review with engineering, quality, purchasing, and sales coordination. This is especially useful when certification results will support a project quotation, tender submission, private-label program, or scheduled production launch.
| Checklist Item | Pass Condition | Owner |
|---|---|---|
| Sample matches frozen BOM | All critical components match the submitted BOM and drawings. | Engineering and Quality |
| Electrical rating confirmed | Measured voltage, wattage, current, and driver data match label and datasheet. | Engineering |
| Installation method documented | Mounting method, spacing, ambient limit, wiring, and driver location are clear. | Engineering and Product Team |
| Safety-critical parts identified | Driver, cable, connector, enclosure material, insulation, fuse, and terminal data are available. | Purchasing and Engineering |
| Photometric requirements aligned | CCT, CRI, SDCM, lumen output, beam angle, and test orientation are defined. | Product Team |
| Labels reviewed | Rating label, warning label, traceability code, and certification mark area are checked. | Compliance and Quality |
| Packaging protects test units | Samples, accessories, drivers, and documents can arrive without damage or missing parts. | Quality and Logistics |
| Lab communication sheet prepared | Test scope, contact details, model list, and special instructions are included. | Project Coordinator |
If any item is uncertain, resolve it before submission. However, if the schedule requires early lab feedback, clearly mark the sample as a pre-compliance or engineering evaluation unit rather than a final certification sample. This avoids confusion between prototype testing and formal approval.
You can contact your technical team or certification partner to confirm the required sample quantity, test scope, document list, and market-specific compliance route before preparing the final package.